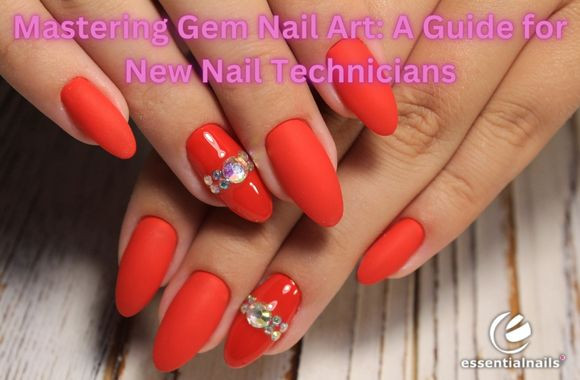
Mastering Gem Nail Art: A Guide for New Nail Technicians
As a newcomer to the nail industry, creating dazzling gem nail art designs can seem daunting. Bejewelled nails have been a longtime client favourite, so mastering this intricate technique is essential. Don't worry – with the right supplies and step-by-step guidance, you'll be applying gems like a pro in no time!
Start with Prep
All nail art starts with a flawless base. Begin by giving your client a thorough manicure - file the nails, gently push back the cuticles, and buff away any ridges. Then apply a thin, even base coat to protect the natural nail and create a smooth surface for better gem adhesion.
Choose Your Gems Wisely
When it comes to nail gems, you have endless options from classic Swarovski crystals to trendy chatons and caviar beads. Always opt for flat-backed gems, as these will adhere best. As you're learning, start simple with just one or two gem sizes, shapes, and colours before advancing to more complex designs.
Grab the Right Adhesive
Using a quality gem adhesive is critical for long-lasting wear. Look for thick, brush-on formulas made specifically for nail art like IBD 5 Second Nail Glue, Young Nails Nail Glue, Crystal Fix, Entity Fuse Adhesive or Gelaze Polyfusion. These adhesives allow precise gem placement and dry quickly.
Application Techniques
To apply each gem, use a toothpick or wax pencil to grab a small amount of adhesive and spread it thinly on the flat back of the gem. Then gently press and release the gem onto the nail surface in your desired placement. For beginners, start with a simple scattered effect or accent nail before attempting more intricate designs.
Gems Over Gel Polish
For gem art over gel polish, the process is slightly different. After curing your final gel colour coat, apply a thin layer of non-cleanse top coat and let it remain uncured - this acts as your adhesive layer. Place the gems into the tacky top coat, then seal them in with another very thin non-cleanse top coat layer. Cure both layers, then cleanse off the dispersion for a smooth finish.
Encapsulating Gems
For maximum durability, you can embed gems right into a gel or acrylic overlay! For gel, place the gems into the base gel and fully encapsulate them with the gel overlay, curing between layers. For acrylics, press the gems into the wet acrylic overlay before it fully sets, then cap with more acrylic and sculpt smooth. The gems become embedded within the nail enhancement.
Finishing Touches
Once your gem design is complete, seal it in with a thick, high-quality top coat if working on natural nails. Avoid flooding the cuticle area. The top coat will smooth out the surface and lock those gems down. If you have access to a UV/LED lamp, consider curing a gel top coat over the design for ultra-glossy, extra durable results.
Practice Makes Perfect
Gem nail art takes patience and time to master. Use nail practice hands, such as the Nail Trainer, to try out different designs and adhesion techniques. Experiment with various gem sizes, colours, and placements. The more you practice, the more comfortable and creative you'll become!
With diligent preparation, proper products, and regular practice, you'll soon have the skills to create stunning gem-adorned nails in all kinds of styles that clients will obsess over. Embrace this sparkling nail art - it's an exciting technique to add to your skillset!

